Hey everyone, Jake here from your go-to outdoor kitchen supplier – and let’s cut to the chase: I get this question at least three times a week: “Can I actually use a fire pit as part of my outdoor kitchen setup?” Outdoor Kitchen
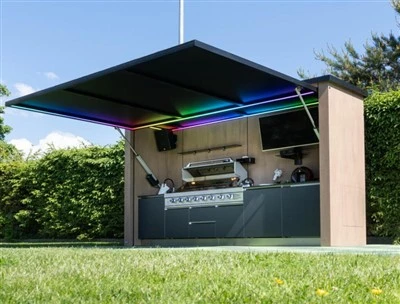
If you’ve spent any time scrolling Pinterest or browsing backyard design forums, you’ve probably seen those viral shots where a fire pit’s right next to a built-in grill, countertop prep zone, and even a mini fridge for s’mores supplies. But if you’re building an outdoor kitchen from scratch, it’s easy to overthink things – like, is this actually safe? Will the heat mess up my other appliances? Is it even functional, or just a fancy Instagram flex?
Today, I’m breaking this down real, no-fluff style, because I’ve seen all the messy (and amazing) outcomes of mixing fire pits with outdoor kitchens. Whether you’re a weekend griller looking to upgrade your space or someone mapping out a full custom setup, this is everything you need to know.
First off – let’s get the basics straight: Yes, you absolutely can. But it’s not just plopping a fire pit next to your grill and calling it a day. The people who nail this have thought through a few key things that make all the difference between a cozy backyard hang and a disaster. Let’s start with the big one: safety, because I’d never lead you wrong here.
Most newbies don’t realize that fire pits put off way more radiant heat than, say, a side burner on your grill. That direct heat can be a problem for things like stainless steel grill hoods, stone countertops (especially if they’re unseated or have porous surfaces), and even propane lines if they’re too close. I once had a customer 2 years ago who tried a cheap tabletop fire pit right next to his new built-in grill, and the heat warped the grill’s control panel in 3 months – oops. So what’s the safe distance we recommend? Rule of thumb is at least 36 inches between any heat source (fire pit) and your grill, prep counters, or any outdoor appliances. If you’ve got a larger fire pit (like a 36-inch or bigger model), bump that to 48 inches just to be safe. Pro tip: If you’re tight on space, go for a gas fire pit instead of wood-burning – you can control the heat output better, and there’s no erratic flames licking up toward your stuff.
Next up: functionality, because an outdoor kitchen should work as hard as you do. If you’re using your fire pit just for ambiance, that’s cool – but why not make it part of the party? I’ve designed a ton of setups where the fire pit’s a central hub, not an afterthought. For example, if you love hosting dinner parties, you can set up your prep counter and grill on one side, and the fire pit on the other – so your guests can gather around the flames while you man the grill, and no one’s stuck inside watching TV. Even better? Some fire pits have built-in shelves that double as extra serving space for sides, drinks, or s’mores fixings. I once did a custom setup for a family that has a pizza oven as part of their outdoor kitchen, and they put a gas fire pit right across from the oven – perfect for keeping pizza parties going all night, with the fire pit’s warmth taking over once the pizza’s done.
Wait, but what about different types of fire pits? Because not all are created equal for outdoor kitchens. Let’s break down the two main types, and which works best for your setup:
Wood-burning fire pits: These are the classic, rustic ones that put off that amazing campfire smell. But if you’re integrating them into a permanent outdoor kitchen, they come with a few downsides. First, they produce way more smoke, which can get in your guests’ faces, and leave ash that’s a pain to clean off your counters or grill grates. Second, they put off unpredictable heat – one minute the flames are low, the next they’re roaring, so that 36-inch safety distance I mentioned? You might need to double it. I still recommend wood-burning for freestanding setups, but if you’re building a permanent outdoor kitchen, gas fire pits are the way to go.
Gas fire pits: Modern versions run on propane or natural gas, look identical to wood-burning ones (yes, they have fake logs or burn stones that look totally real), and you can control the flame height with a switch. They’re way cleaner – no ash, way less smoke – and their heat output is consistent, so you don’t have to worry about sudden flare-ups damaging your stuff. Plus, you can sync them to your outdoor kitchen’s setup (think: a single control panel for both your grill, your side burners, and your fire pit) – that’s a game-changer for convenience. A lot of my clients love this because they can fire up the grill and the fire pit with one tap, no fumbling with lighters or multiple tanks.
Another big question: Will the fire pit mess up my outdoor kitchen’s materials? That’s a common worry, especially if you’ve invested in high-quality counters or stonework. Let’s talk materials, because this is where people get tripped up.
First, stone or concrete countertops: These are super durable, and can handle the heat from a fire pit no problem. Even if they’re right next to it, you won’t have to worry about discoloration or damage – I’ve had setups where fire pits are 12 inches from stone counters, and they look like new 5 years later. The only exception is if your countertop is unsealed (like some types of limestone) – but a quick sealant application fixes that, and most outdoor kitchen counters come pre-sealed these days, anyway.
Stainless steel appliances: Good news here! Stainless steel is heat-resistant, so it can handle radiant heat from a fire pit – but direct, sustained heat (like if your fire pit was touching the grill’s side) is a no-go. That’s why that 36-inch distance is key. I once tested a 2-minute experiment where I held a stainless steel grill hood 18 inches from a medium-size gas fire pit – after an hour, there was zero discoloration or warping, which is way better than wood-burning pits, which would’ve caused slight fading in that time.
Tile or backsplashes: Same as countertops – most outdoor grade tiles (like porcelain, stone, or concrete) can handle the heat. If you’ve got a painted backsplash, though, that’s a different story. Sustained heat can make the paint peel, so keep your fire pit at least 24 inches away from any painted surfaces, or go for a heat-resistant tile backsplash if you’re installing from scratch.
Now, let’s get into the fun part: how to actually integrate a fire pit into your outdoor kitchen, so it’s not just a separate thing. I’ve got three go-to layouts that work for almost any size of backyard.
-
The Cozy Corner (for small spaces, like 10×12 backyards): If you’re tight on room, tuck your fire pit into the far corner of your outdoor kitchen, with your grill and prep counter along the adjacent walls. This keeps the heat away from your main cooking zone, and creates a defined nook for hanging out. I did this for a couple in Austin who had a tiny urban backyard, and they told me this setup doubled their hosting capacity – before, they could only fit 2-3 people around their grill, now they have 6-7 around the fire pit.
-
The Central Hub (for medium to large yards): This is the viral Pinterest layout, and for good reason – it’s perfect for big groups. Put the fire pit right in the middle of your outdoor kitchen, with the grill, side burners, and mini fridge arranged around it. Your cooking zone is on one side, seating on the other, and everyone’s connected. Bonus: Add a granite countertop overhang next to the fire pit, so you can set down drinks or plates without having to move around too much. A recent client of mine used this for his Super Bowl party, and he had 12 people hanging out – half grilling, half by the fire pit, and it stayed totally functional.
-
The Dual Zone (for people who want separate spaces): If you love both grilling and fire pit nights but don’t want them to overlap, split your outdoor kitchen into two zones. One is the cooking zone (grill, prep, storage) on one end of your patio, and the fire pit/seating zone on the other, connected by a small walkway. This works great if you have kids or pets – you can keep the fire pit on the “hangout” side and the cooking on the “no running” side, plus you don’t have to worry about smoke from the fire pit getting in your food while you’re cooking.
Wait, but what about maintenance? No one wants a high-maintenance fire pit attached to their fancy outdoor kitchen. Let’s keep this real – gas fire pits are way easier than wood-burning ones. For gas, you just need to check the lines once a year (I always include a free line check for all my clients’ first year), and wipe down the burner with a soft cloth every few months to keep debris from clogging it. As for the outdoor kitchen around it, just do regular wipe-downs of counters and appliances, same as you would anywhere else. Wood-burning pits need more work – ash disposal, cleaning the chimney (if it’s a built-in one), and checking for rust – so if you don’t want extra chores, stick with gas.
I also need to address a common myth: A fire pit will make your entire outdoor kitchen way too hot to use in summer. Yeah, if you leave it cranked at full blast in July, that might be a thing – but most people turn the flame down for summer evenings, and even at low heat, it’s only noticeable within 18 inches of the pit. Most of my clients say the fire pit actually extends their outdoor season – they use it earlier in spring and later in fall, when the nights are cool, instead of just summer.
At the end of the day, the best part of integrating a fire pit into your outdoor kitchen is that it makes your space feel like yours. It’s not just a place to cook – it’s a place to gather, roast marshmallows, have a drink after dinner, or even just sit and watch the stars. I’ve seen so many clients go from a basic grill setup to an outdoor kitchen with a fire pit, and they all say it’s the upgrade that made them use their backyard way more than they did before.
If you’re thinking about adding a fire pit to your outdoor kitchen, here’s a quick recap to make sure you nail it: Pick a gas fire pit for ease and safety, keep it at least 36 inches from your grill and appliances, go for a layout that fits your backyard size, and don’t forget to plan for maintenance.
I’m here to help you figure out exactly what works for your space – whether you’re a total beginner or you’ve been building outdoor stuff for years. If you want to chat through your setup, get recommendations for fire pits that pair well with your outdoor kitchen, or just ask more questions, hit me up. We can go over everything from safety specs to layout ideas, no pressure, just real advice from someone who’s been doing this for a while.

Let’s make your backyard the spot everyone wants to hang out at.
Glass References
- Outdoor Kitchen Safety Guidelines, National Fire Protection Association
- Radiant Heat Distances for Outdoor Appliances, Outdoor Kitchen Industry Association
- Fire Pit Maintenance Best Practices, American Gas Association
Shandong RobynGoods Imp&Exp Co., Ltd.
As one of the most professional outdoor kitchen manufacturers and suppliers in China, we also support customized service. Please rest assured to wholesale discount outdoor kitchen in stock here from our factory. Quality products and reasonable price are available.
Address: Room 414, Shengdiguangyao Mansion, Shencheng Subdistrict, Shouguang, Weifang, Shandong Province, China
E-mail: info@robynoutdoor.com
WebSite: https://www.robynoutdoor.com/
